Pointing to the Universe logo
  • Home
  • CCD-Gallery
  • DSLR-Gallery
  • Solar System
  • Equipment
  • Lightpollution
  • About
  • Links
  • Poster
  • Contact

Man-made light emission largely limits the magnitude of stars and other objects we can see in the night sky, either by the naked eye or with a telescope. Increasing population density and badly illuminated billboards result in bright skies. Also in astrophotography lightpollution is a big problem: Total exposure times have to be increased dramatically to get pictures of dim objects. There are many sources of light pollution around the Antares Observatory and things unfortunately don't get better with time. The maximum magnitude reached here is about mag 5 at its best (not before roadlights have partly been switched off).

Light Pollution Light Pollution

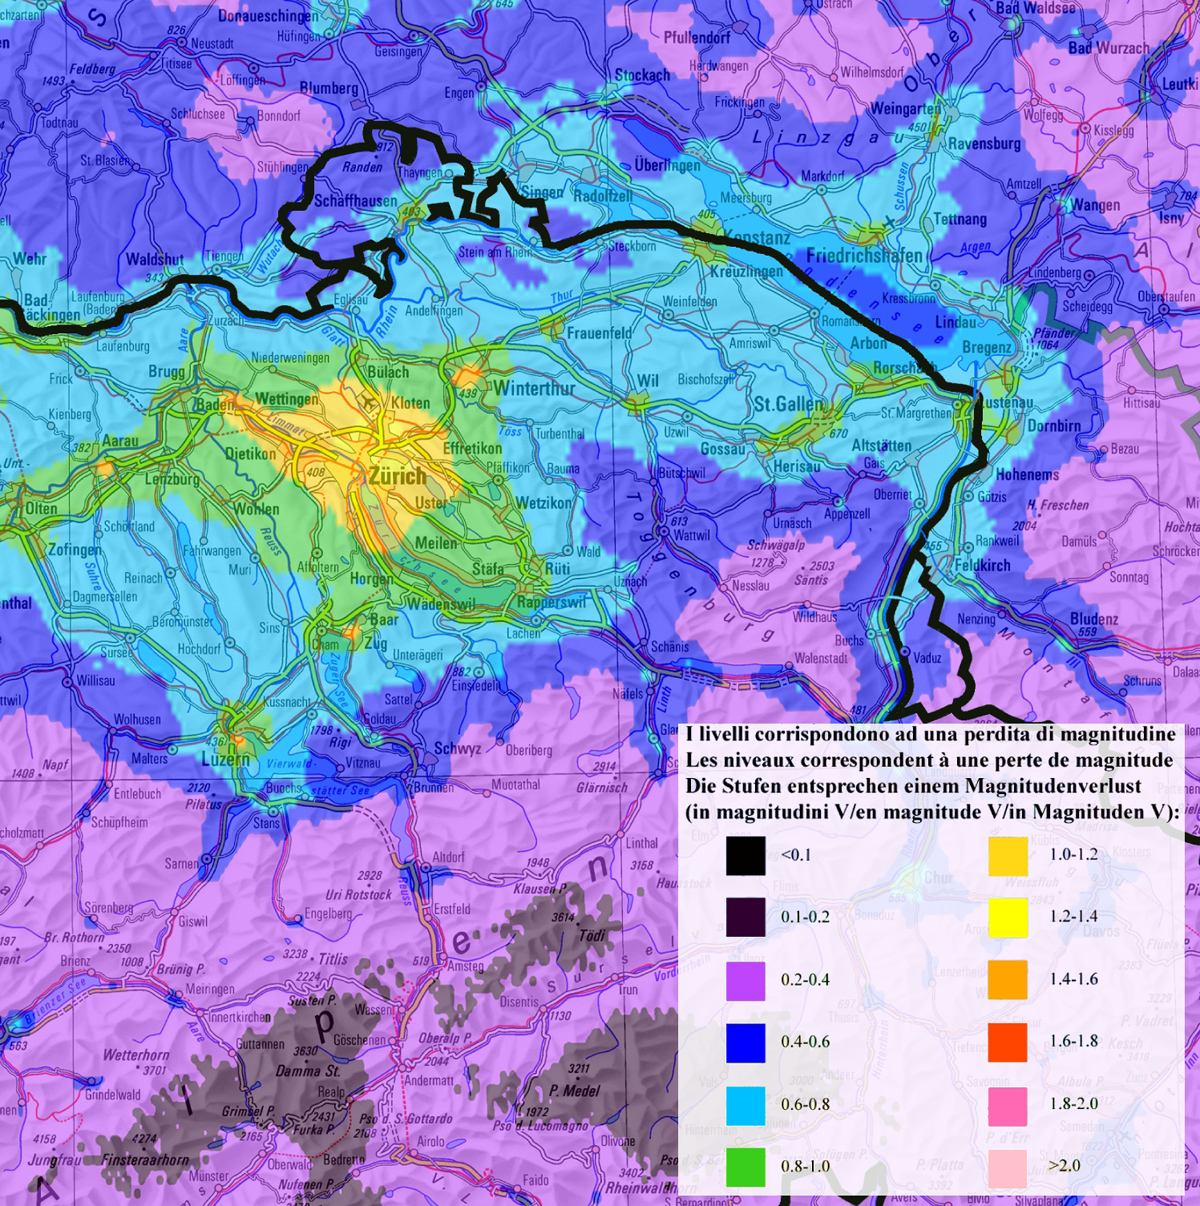
Below you see two lightpollution maps of the area. For additional information, see also:

  1. Light pollution in switzerland (diploma thesis by R. Kobler - in german)
  2. Dark sky association switzerland (german)
  3. International Dark sky association
  4. Dietmar Hager - Astrophotographer and physician. HIGHLY RECOMMENDED!!
  5. David Miller - Ecological effects of light pollution!

Light Pollution map1

[Cinzano et al. Blackwell Science]

Light Pollution map2

[www.darksky.ch]


Practial example:

Here I show the effect light pollution has for astrophotography. Using the identical imaging train (same telescope, same camera, same camera settings) under very similar sky conditions (in terms of sky transparency), images from the same objects were taken on two subsequent nights. To better see the real effect light pollution has the test images were stretched with a single non-linear function. The exact modifications on all images are given below.

Observatory locations

Figure 1: Approximate location of both observatories where test images have been acquired. Note that this map shows the situation of 2001. The situation got worse but I could not find an more accurate map.
--> Ceres Observatory
--> Antares Observatory

Equal Scaling

Figure 2: Equal Scaling
Crop of single 30min luminance images of the Cocoon Nebula. The identical non-linear stretch function was applied to both images. Note how much brighter the right image is (taken at a higher level of light pollution).

Equal Background Brightness

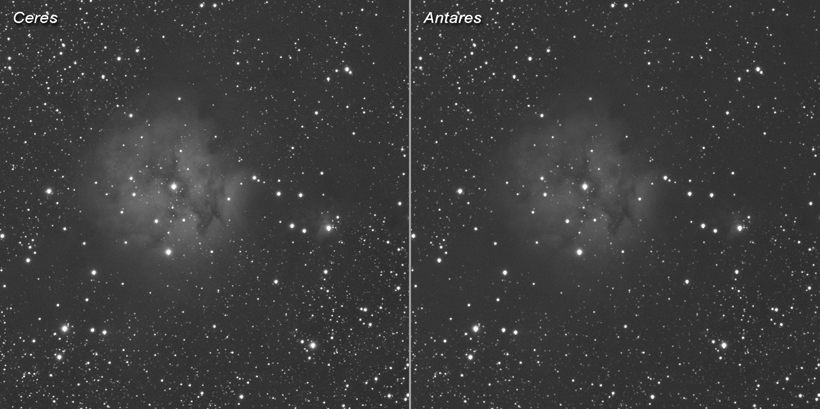
Figure 3: Equal Background Brightness
Both images are the same as in Figure 2. However the right one was adjusted such that the background brightness matches the one on the left (this is what one ususally does to reduce the background brightness). Note the considreable lower brightness of the nebula!

Equal Nebula Brightness

Figure 4: Equal Nebula Brightness
The image on the far left is a single 30min exposure taken at the Antares observatory. The central picture is a single 30min exposure too but was taken at Ceres observatory. And the image on the far right is the average of two 30min exposures taken at the Antares observatory. The three images shown a 200% were adjusted such that all of them have an equal nebula brightness, regardless of the background noise level.
When viewing the true 200% resolution image (click on image) you might notice that the central image appears sharper than the other two. Sharpness (also in the nebula) should not be mistaken with lighpollution. This is an effect of air turbulences (seeing) which was slightly better the first night (at Ceres observatory) than in the second one (beside the fact that Ceres observatory is about 300m higher in altitude).

Bottom line: For an image with equal quality I need to at least(!) double the number of single images when the data is acquired at the Antares observatory. Or in other words, I could double the number of images within the same observation time without quality loss!

Finally I would like to thank Christian, Rainer, and Egon who invited me to their observatory, it was a great night!

All images and content copyright © Fabian Neyer